Vision Without Glasses - How To Naturally Sharpen Your Vision and Throw Away Your Glasses or Contacts WITHOUT SURGERY!

Sunday, November 4, 2012

Exfoliating Pumpkin Scrub

Exfoliating Pumpkin Scrub

Get your skin glowing and ready for your fall and winter festivities with one of nature's more beneficial vegetables--the pumpkin.  Pumpkins make an excellent exfoliating face mask for all skin types: oily, normal-oily, or dry skin.  It soothes, moisturizes, and nourishes your skin.  So, if you are looking for a way to reuse and recycle your carved pumpkins from Halloween, or the leftovers from making your famous pies, then look no further!

So, what's so great about pumpkins?

They are rich in Vitamins A, C, as well as zinc.  Vitamin A is used in skin-healing products, so if you are looking to replenish and nourish your skin, this is the way to go.  Vitamin C is an anti-oxidant and when all three combined, they are creating a great barrier from free radicals (toxins in the air) from affecting your skin negatively (by causing premature aging) and from clogging your pores, which helps prevent acne.

Ingredients:

5-6 tablespoons of pumpkin pulp
3-4 tablespoons of brown sugar (buy brown sugar here.)
1 teaspoon of lemon juice (buy cinnamon sticks here.)

Directions:

Take the pulp and put it in the blender for a few seconds until you achieve a paste consistency.  Add the brown sugar and the lemon juice to the paste and mix well.  Use a spoon or fork.

Apply the scrub to your clean face and gently scrub in small circles using your fingertips.  Do this for a minute or two to slough off dead skin cells.  Rinse with cool to warm water.  Remember to always tone your skin to balance the ph level after you wash your face.  Moisturize as usual.

See Other Home Remedies:

Saturday, October 27, 2012

Lemon Sugar Hand Scrub

Lemon Sugar Hand Scrub

During the winter I struggled with the embarrassing problem of having dry hands. The dry winter weather has wreaked havoc on my skin in general, so I decided enough was enough. Since many of us are on a budget, I decided to use whatever I have in my pantry to make a simple, easy to use lemon sugar scrub for your skin. You should already have most, if not all, of these items in your kitchen pantry already. If not, these items can be found at your local grocery store for less than $20.

Ingredients:

1 medium lemon
1 cup white sugar
1/2 cup grapeseed oil (buy grapeseed oil here.)
2-3 tbsp honey (optional)
1 tbsp coffee grounds (optional)

The amount of the ingredients you use depends on how much you want to make for yourself. I suggest not making too much because the mixture should be used within a month of being made since the items are food items and thus perishable.


Directions:

Take a medium sized mixing bowl.

Add a cup of sugar followed by half a cup of grapeseed oil.  Sugar and Oil should have a 2:1 ratio.

Start to mix using a spoon until it develops a slushy texture.  Add 2-3 tablespoons of honey.


Squeeze half a medium sized lemon into the mixture.  (If you are planning on using this regularly, then consider purchasing lemon juice here.)  Zest the lemon and add to the mixture. You can use a grater to zest the lemon. If you stir it enough, you should not be able to see the zest.  It is okay if you are able to, however.

Repeat once or twice a month or as needed.

Storage:
The mixture above makes enough for a 10 oz spice jar or you can gift them to other in smaller spice jars that are 2.5 oz each.

There is no need to put this in the fridge, but remember to use the scrub within 1 month of making it. Also, you can use this scrub for your entire body in the shower.

Don't Miss Other Home Remedies:


Thursday, October 4, 2012

Coconut Oil Hair Treatment

Coconut Oil Hair Treatment

Coconut oil has been used for years in India and the Philippines as a hair treatment.  Other oils such as olive and grapeseed oils are really good for your hair especially for deep conditioning purposes.  However, if you are looking for a hair oil treatment that you don't need to wash out, then coconut oil is the one you are looking for.

Coconut oil helps by reducing the amount of protein lost from harsh everyday elements such as sun, wind, and shampoos.  By cutting down on protein loss, these coconut oil hair treatments help guard against the thinning and deterioration that can occur as we age, which in turn helps reduce hair loss.  More so, some people have even claimed that by massaging coconut oil into their scalps, they witnessed renewed hair growth.  Hey, whatever works, right?

This oil is an excellent conditioner and you can use it daily on the midsections and ends of your hair as a leave in conditioner after you shower also.

Hot Oil Treatment

Ingredients:

2-3 tbsp for shoulder length hair (my hair is much longer--down my back--so I use 3/4 cup of oil to make sure I don't run out)
towel / cling wrap

Directions:

Moisten your hair - do this using a mister or wet your fingers and run them through your hair to get your hair damp.

Warm the coconut oil in a small cup or bowl using either the double boiler method or by microwaving the oil in 10 second increments.

Once you make sure the oil is not too hot for your hands or scalp, divide your hair into segments on top of your hand and  take the oil and massage it into your scalp in circular motions.  This promotes blood flow and circulation and also helps to make your scalp stronger.

Note
: For some, massaging your scalp gently is the way to go until your scalp gets stronger so your hair doesn't shed as much.

Once your scalp has been massaged, take the coconut oil (make sure it stays warm otherwise it starts to cool and solidify) and massage it between your palms and then run your palms through your hair until all your strands are covered.

Wet the towel so that it is warm and moist and wrap it around your head for an hour or until the towel cools.  Once it cools, you can replace it with saran / cling wrap.  You can leave this treatment on overnight too.  Coconut oil is pretty easily absorbed so washes out fairly quickly as well.

Rinse out with water and a mild shampoo.  Remember, you can also apply the coconut oil to your midsections and ends of your hair -- just don't overdo it or you will get the greasy look.  This is a great replacement for gel or hair spray if you are out because when coconut oil is first applied it is a liquid, but once it cools it solidifies and acts as a hair gel/pomade of sorts and thus is quite popular in some salons as a natural styling agent.

Buy coconut oil here.

Enjoy!

Did you try this treatment? Let me know what you thought of it!

Don't Miss Other Home Remedies:


Monday, August 27, 2012

Sexy Wavy Beach Hair: Sea Salt Spray

 Sexy Wavy Beach Hair: Sea Salt Spray

If you're looking the natural beach wave look for your hair that's all the rage you've come to the right place.  Sexy wavy beach hair that looks effortless and sea blown is a timeless look and one that can also save you a lot of time if you're in a rush.

There are products on the market that allow provide serums that will create the sexy wavy beach hair look, however they can be expensive.  These products can also be drying which in turn can be damaging to your hair.

Instead, you can use natural products that you already have in your pantry to create the wavy beach hair that you desire.  You can create a sea salt spray for hair that will create beachy waves in your lovely locks.  A little sea salt goes a long way.  Read more to find out how to create a homemade sea salt hair spray.

Ingredients:

1 tablespoon seasalt
1/4 teaspoon coconut oil (or grape seed oil)
1 cup of water
1 spray bottle

Directions:

Add the sea salt and the coconut oil to the water in the spray bottle and shake well.  Every time you use the sea salt spray you will have to shake well to make sure all the ingredients mix properly. 

Spray the mixture generously onto your hair use your fingers to scrunch your hair together upwards to create waves.  You can also create a few loose braids in your hair and spray the mixture.  Unfasten your braids after the mixture has dried a bit and shake out hair a bit with your fingers. (don't use a brush!).

Enjoy!
---

Don't Miss Our Other Homemade Remedies:

Thursday, August 16, 2012

Apple Cider Vinegar And Cornmeal Face Scrub

Apple Cider Vinegar and Cornmeal Face Scrub

Apple Cider Vinegar And Cornmeal Face Scrub

So, why is apple cider vinegar good for you?

After all, it is a vinegar and that’s supposed to be bad and burn your face, right?

Wrong.

Apple cider vinegar—and any vinegar in general—has a tonic effect on your skin.  Your skin has a natural pH balance anywhere from 5 to 7.  Cleansers and other variables cause the natural pH balance to be thrown off.  Toners solve this problem and apple cider vinegar helps re-balance your skin. 

There are many other benefits of using apple cider vinegar on your skin.  ACV helps promote blood circulation in small capillaries on your face.  It also helps reduce the appearance of scars left by acne. And, speaking of acne, apple cider vinegar is an antiseptic which means that it gets rid of the bacteria that can clog your pores and cause acne.  Along with these great benefits, apple cider vinegar also helps brighten your skin.

The apple cider vinegar and cornmeal facial mask/scrub is great for exfoliating your skin and balancing the pH level at the same time.  The cornmeal sloughs away dead skin cells that can also clog your pores thus further causing acne and other skin problems.  Dead skin cells can make your face look aged and tired when it could actually look smooth and supple.

Ingredients:


Organic (good quality) apple cider vinegar (buy apple cider vinegar here)
Water for dilution
2-3 tablespoons of cornmeal (buy cornmeal here)

Directions:

Before you mix the apple cider vinegar and cornmeal together to form a paste, you may have to dilute the apple cider vinegar with water.  The amount of apple cider vinegar you use depends on your skin’s sensitivity.  Some people will mix it with water with a ratio of 1:1 (½ water, ½ACV).  You can add more water if your skin is more sensitive or you can use no water at all—however, keep in mind that ACV is an acid and can burn your skin if you are not careful. 

After you have diluted your ACV, mix it with the cornmeal to create a paste and facial scrub for your face.  Apply it to your face in a circular motion using your fingertips.  Make sure you keep it away from your eyes or it will burn! 

Rinse off the scrub thoroughly with water and a gentle soap if needed.  Your skin has just been toned so it’s not necessary to tone again.  Moisturize as usual. 

Enjoy!

--
Don't Miss Other Homemade Remedies:

Friday, July 13, 2012

Apple Cider Vinegar for Acne

Benefits of Using Apple Cider Vinegar for Acne

Many teenagers and adults suffer from stubborn acne and apple cider vinegar has proven to me that it can actually help rid your skin of bacteria causing acne.  Over the last few decades, there have been many advancements in the skin care arena.  When you walk into a beauty store you are bombarded with all sorts of acne washes and creams (Murad, ProActiv, Clearasil, Neutrogena, etc.)

Each one of these acne cures and solutions, claims to combat your acne within a certain time frame and promise drastic results.  While these creams and washes may work great for a lot of people, there are a lot of people who cannot buy these acne products because they are either too expensive, or they they just don't produce the results you would expect in the prevention or treatment of your acne!  Most of us have suffered from acne breakouts that have taken over our lives, lowered our self-esteem, and made us hate looking in the mirror. 

However, there is still hope: a home remedy for acne that uses Apple Cider Vinegar (ACV).  Of course, when people think of apple cider vinegar, most don't picture this natural toner as a cure that can help clear up your acne, and also help cure many other ailments--there are many benefits.  (Read my post on how you can use Apple Cider Vinegar to get shiny hair.) Use natural, organic (raw) Apple Cider Vinegar for your acne treatment.  

Apple Cider Vinegar for acne treatment is a great alternative to harsh chemical bought solutions because it is one of the most power natural cleansers out there.  It is a natural toner so acts as an astringent to reduce the size of your pores as well!  If you're suffering from acne breakouts this is great news because Apple Cider Vinegar can help balance your skin's pH level (acidity level).  This in turn helps make sure that the acne causing bacteria cannot thrive.  Apple Cider Vinegar will also help you clear up excess oily skin. 

This helped me clear up a lot of stubborn acne that was not responding to any other treatments.  It was extremely frustrating until I did some research and was able to find this all natural acne home remedy and am I glad I did!  It was starting to take a toll on how I viewed myself, and I started to become overly worried about how others viewed my acne on my skin.  At one point, in my adolescent years, I was so fed up I decided to live with the scars and acne.  I can tell you, that Apple Cider Vinegar did the trick for the treatment of acne for me!

Here's what you need for the Apple Cider Vinegar treatment: 

Ingredients:

Natural, Raw, Organic Apple Cider Vinegar [buy ACV from Amazon here]
Cotton swabs

Directions:

Pour some Apple Cider Vinegar onto a cotton ball/swab or Q-tip and then apply all over your face, focusing specifically on your acne prone/breakout areas.  ACV can be used all over your body as well.  Hold the swab to your problem areas for a few minutes at a time.  Rinse your face thoroughly and tone and apply moisturizer as usual.  You can use this treatment 2x a week depending on how sensitive your skin is.  If you have sensitive skin, (as many adolescents do with acne do), then dilute the Apple Cider Vinegar so that it is 1:1 ratio with water (1 part water, 1 part Apple Cider Vinegar).  In essence, you are making a toner to help in the prevention of acne breakouts!

When you are making your acne toner you will notice that Apple Cider Vinegar has a very strong odor.  Yes, it can be unpleasant, but it doesn't last and after a few minutes you will get used to the smell of it and once it dries you will barely notice the smell, and it's worth not having to deal with stubborn acne breakouts!  If you notice some redness and tingling is normal and should go down in about 10 minutes after using the ACV toner.  This is a great all natural toner for acne and can be stored in the fridge or out on your counter as long as it's not too hot.

Within a few weeks, you should see significant results in the amount of acne and acne scars on your face.  I am an adult and having been using Apple Cider Vinegar for the treatment of my acne for over two years and I've had to use it less and less to the point where my skin is nearly flawless and I use it for the occasional acne breakout when I've been careless and not washed off my makeup!  


Remember to be careful because apple cider vinegar is an acid and can actually burn your skin if you're not careful. 

--
Don't Miss Other Home Remedies for Acne:

Tomato Yogurt Fresher Skin Formula

Tomato Yogurt Fresher Skin Formula

Shed your dead skin cells!  Our skin has a layer of dead cells that are bound together by a "glue."  Exfoliation is the key in maintaining a fresh and clean complexion and shedding your dead skin cells.

This face mask works for all skin types and is especially beneficial if your skin is constantly exposed to outdoor elements.  Whether you're an outdoors or indoors person, this face mask will help freshen your face up without the use of any harsh stimulants or chemicals.

This is an quick and simple formula that will help dissolve the "glue" that is binding the dead skin cells together (alphahydroxy fruit acid from the tomatoes) revealing your smoother, softer skin underneath.

Ingredients:

2 tbsp yogurt
1/2 chopped tomato
1/4 cup sugar (granulated)

Directions:

Add the sugar and tomato into a bowl and use just enough tomato to make a paste out of the sugar.  Add the yogurt and continue until it's a smooth paste.  Apply directly onto skin--massage gently.  Leave on for 10 minutes and rinse off with warm water. Pat dry.

Make sure you wash your face and that it is damp when you apply this mask.

Note: Leave out the sugar if it is too rough for your face, but use the whole exfoliating formula on your body.

Enjoy your smoother skin!
--

Don't Miss Other Home Remedies:


Thursday, June 7, 2012

Simple Turmeric and Milk Face Mask

Simple Turmeric and Milk Face Mask

Turmeric is probably not the first thing you think of when you hear the words "face mask."  I just used this face mask myself.  I had a few minutes to relax and decided to whip up a turmeric and milk concoction and was very pleasantly surprised.  I had been reading about the healing powers of turmeric for some time now and the results are very encouraging for the people like you and me!  Read more about the healing powers of turmeric here.

Ingredients:

2 tsp turmeric powder
1 tbsp milk (enough to make a paste)

Yardley 359594 Yardley Of London Apothary Face & Body Mask- Case of 100 

Directions:

Mix the ingredients together to make a paste.   Don’t worry if the paste seems too runny.  It will thicken and harden on your face.

Using your fingers or cotton swabs, rub the paste over your face, avoiding the eye area.  It doesn’t smell funny–just a little spicy.  Keep the mask on for 15-20 minutes.

You will feel your face start to tighten as the mask dries.  Wash off and rinse with cold water.

My face feels really soft and the turmeric faste paste has actually gotten rid of my t-zone shine.  No matter what, my nose always ends up being shiny but this seems to have helped that! Awesome!

Remember! Turmeric stains so make sure you do not get any on your clothes or wear something you don’t mind staining (I just put on an oversized t-shirt that I’ll never wear in public anyway).


Don't Miss Other Home Remedies:


    Thursday, May 31, 2012

    Healing Veggie Mask

    Healing Veggie Mask

    These days there are plenty of skin products that are available to help your skin, but they all contain chemicals which are not natural and could potentially harm your skin in the long run.  Making your own homemade remedies also helps you save a ton of money!

    It's good to get back to the basics sometimes and treat your skin to all natural products that can be found in your refrigerator.  

    This is a simple mask containing only three ingredients so it's quick and easy to make and apply to your face.  Cucumbers provide moisture, erase dark circles, and help heal wounds.  They contain manganese and Vitamin C which is essential for your body in the creation of collagen.  This in turn helps keep your skin feeling elastic.

    Parsley is great for clarifying and balancing combination skin.

    Ingredients:

    1 tablespoon parsley 
    1 tablespoon cucumber (about 1/5 cucumber)
    1 tablespoon yogurt (regular white yogurt)

    Directions:

    Take the parsley, cucumber, and mix it with the yogurt in a blender until smooth (not liquidy) enough to apply to your face.  It will feel cool and refreshing.  Leave it on for 10-15 minutes and rinse off.  

    Enjoy!

    Don't Miss Other At Home Remedies:

    Wednesday, May 30, 2012

    Virgin Pina Colada Face Mask For Smooth Skin

    Virgin Pina Colada Face Mask For Smooth Skin

    Pina Coladas are absolutely delicious.  They are comprised of pineapples and coconut milk.  So, you may be wondering what makes these two ingredients great for skin?

    To start, coconut milk is high in fat.  The dirt and oils in your pores are mainly fat soluble so this makes coconut milk a great natural cleanser.

    Pineapples have papain in them.  Papain are enzymes that help dissolve dead skin cells.  With the combination of coconut milk which clears your pores, and pineapples to get rid of dead skin cells you can get clearer, smoother looking skin.

    Ingredients:

    1/4 cup of fresh chopped pineapple
    1 tablespoon of coconut milk (buy pure coconut milk)

    Directions:

    Add the pineapple and coconut milk and blend together in a blender until smooth.  Apply to your clean face using your fingertips.

    Once you are done applying it all over your face (avoid eyes), lay down and leave on for about 10-15 minutes and then rinse it off with warm water.  You can repeat this mask 2x a week.

    Remember to always tone after you wash your face.  Toning closes your pores and helps prevent dirt, oil and free radicals from clogging your pores leaving you with smoother skin just in time for your tropical paradise vacation!

    Enjoy!

    Don't Miss Other Homemade Remedies:


    Saturday, May 19, 2012

    At Home Sunless Tanning


    Thinking About Sunless Tanning?

    With summer fast approaching, an important issue comes up for some of us: to tan or not to tan?

    Limited exposure to the sun is always encouraged because in the long run, constant exposure to the UV rays from the  sun cause fine lines and wrinkles to appear sooner and start to run deeper.

    Tanning beds are a big no-no due to the harmful exposure to UV rays.  Despite being damaging to your skin, UV rays are a major risk factor for skin cancer.

    If you are looking for a natural looking tan then try this at home tanning recipe.  This recipe is also a great way to achieve a last minute "summer glow."

    Ingredients:

    8-10 black tea teabags (you can choose from these.)
    4 cups of water
    spray bottle (buy an empty spray bottle here)

    Directions:

    Steep your tea bags in the water for about 15 minutes or until you get the desired color.  Place the water in a spray bottle for easiest application.

    Spray over your entire body the night before and let it dry.  Once it dries it leaves you with a light brown glow.

    If you have already used a store-bought tanner and have an orange tinge, you can use this at home remedy to get rid of the orange tinge and achieve a more brown tan.

    Add more tea bags for a darker tan.  This is not permanent and will wash off in the shower depending on your skin.

    Enjoy!
    --
    Don't Miss Other At Home Remedies:

    Friday, May 11, 2012

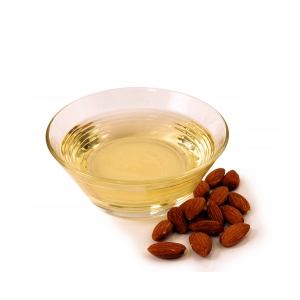
    Sugar Almond Oil Body Scrub

    Sugar Almond Oil Body Scrub

    Summer season means bikini season!  Just like you wouldn't wear old clothes to a new school year, you shouldn't wear your winter-dry skin to the beach!  Exfoliating your skin will give your body a fresh and more polished look and feel.

    I created this scrub because I have used almond oil and grapeseed oil before and it works wonders on your skin.  These oils are great for your skin because the almond oil is rich in Vitamin E which is great for helping keep away wrinkles and grapeseed oil is great for helping your skin retain its moisture.  This is especially important because grapeseed oil is unlike alcohol based moisturizers that evaporate after a few hours.

    Ingredients:

    1/2 cup of almond oil (Choose from these.)
    1/2 cup of grapeseed oil (Choose from these.)
    2 cups granulated sugar (regular white sugar)
    1 teaspoon vanilla extract (optional)

    Directions:


    Mix all the ingredients together in a bowl until you reach a thick pasty consistency with sugar granules.
    Massage the scrub all over your body in circular motions, making sure to go easy on the more sensitive parts like your abdomen and inner arm.  You can scrub your knees and elbows more vigorously.

    Rinse off and pat dry.  If you feel too greasy, you can use a mild body wash to remove some of the excess oil.

    Enjoy!
    --
    You can buy almond oil here and grapeseed oil here.

    Don't Miss Other At Home Remedies:

    Wednesday, May 2, 2012

    Simple Honey & Rolled Oats Face Mask

    Simple Honey & Rolled Oats Face Mask

    This is one of my favorite homemade facials to make because I always have some rolled oats (uncooked) that have already been through the processor in a jar ready to be mixed with the next ingredient.

    I decided to use one of my other favorite ingredients along with the rolled oats, and that ingredient is honey.  I have currently run out of manuka honey so I used acacia honey instead.  You can use any type of honey you have, however, each type of honey has its own healing properties and manuka honey is the best kind for your skin and for use in cosmetics.

    Ingredients:

    2 tbsp honey (Buy Manuka Honey here)
    2 cups of rolled oats

    Directions:

    Blend your rolled oats (uncooked and or the instant oats are fine) in a blender or food processor so that it is a finer texture.  Add the honey* to the mixture and apply to your face using your fingertips.  Make sure your face is initially makeup free.  Leave the mask on for 10 minutes and then rinse off thoroughly with warm water and pat dry.  Remember to always tone and then moisturize your skin.

    *Some people experience burning and itching when they apply honey to their face.  If you do, please remove the mask immediately as you may be allergic.

    Enjoy!
    --
    Don't Miss Other Home Remedies:

    Tuesday, May 1, 2012

    Top 5 Mother's Day Head 2 Toe Homemade Spa Recipes

    Top 5 Mother's Day Head 2 Toe Homemade Spa Recipes

    This is a great way to pamper your hard-working, caring, and loving mother on Mother's Day!  These are the top 5 head to toe treatments that will leave your mother feeling nourished, relaxed, and all over special.  Make the day even more special by spending some time with your mother and do these homemade treatments together! That will definitely put a smile on her face.  Remember, since these are homemade, the recipes should cost you little to nothing so it's a great Mother's Day gift idea if you're strapped for cash.

    1. Chocolate Face Mask
    2. Grapeseed Hot Oil Treatment for Stronger Shinier Hair
    3. Healing Turmeric Bath
    4. Softening Milk Foot Soak
    5. Delicious Vanilla & Brown Sugar Body Scrub

    Enjoy! --


    Honey & Almond Oil Homemade Face Mask

    Honey & Almond Oil Homemade Face Mask

    Moisturizing your face is essential for preventing wrinkles and fine lines from appearing later on.  You should start taking care of your skin at a young age.  Of course, the last thing you want to do is risk putting harsh chemicals on your skin so you can start with this homemade remedy.

    The honey and the egg yolk will penetrate your skin and moisturize it.  The honey also helps your skin retain moisture.

    Almond oil is rich in unsaturated fats and essential fatty acids which get easily absorbed into your skin.  It is also rich in Vitamin E and Vitamin K.  Vitamin E is an great antioxidant which also helps keep you skin safe from free radicals (chemicals) in the air.

    Similar to honey, it helps reduce the skin's water loss (helps to bind the water) thus reducing dry, and rough skin.

    Read more after the jump.


    Ingredients:
    1 egg yolk
    2 tbsp honey
    10 drops of almond oil

    Directions:
    Mix all the ingredients in a bowl to make your mask.  Leave it on for 10-15 minutes and make sure you're completely relaxed at the same time :) Take some time out for yourself!

    Rinse off thoroughly and pat dry.  Remember to use a toner after you wash your face, followed by a moisturizer!  Toning is extremely important because it balances the pH level of your skin and also closes your pores so that the moisturizer and other dirt don't get into your pores and clog them.

    Enjoy happier skin!
    --

    Don't Miss Other Home Remedies:

    Friday, April 27, 2012

    Life's A Peach: Revitalizing Face Mask

    Life's A Peach: Revitalizing Face Mask

    Peaches are really good for your skin which is why they are used in many cosmetic and skin treatments.  They contain Vitamin C and Vitamin E which are imperative in the creation of collagen in your skin.  Applying peaches topically helps your skin tremendously because peaches help unclog pores, smooth fine lines, and revitalize your face.

    Other ingredients in this homemade facial include honey and yogurt.

    Honey helps your skin retain moisture and the yogurt helps bring all of the ingredients together as it moisturizes your face while simultaneously fighting acne.

    Read on for the recipe.

    Ingredients:

    1 peach
    2 tbsp yogurt
    3 tsp honey

    Directions:

    Mix all the ingredients together in a blender.  This is easiest made in a blender, but if you don't have access to one, you can use a fork and mash up the peach pulp as best you can.  Don't forget to remove the pit.  Apply the mask to your face using your fingertips.  Leave it on your face for 10-15 minutes and then remove it with water and pat dry.

    Enjoy revitalized skin!
    --
    Don't Miss Other Home Remedies:

    Wednesday, April 25, 2012

    Moisturizing Honey & Egg Face Mask

    Moisturizing Honey & Egg Face Mask

    Do you have dry, tired looking skin?  If you're suffering from skin that doesn't retain moisture and is consistently dry then this moisturizing honey and egg face mask is the one for you! (If you're looking to nourish your skin for it to be more supple, then this mask will also work).

    Honey has antioxidant properties and is really good at retaining moisture in your skin.  The antioxidants help to keep all the free radicals from affecting your skin.  Free radicals are chemicals that are in the every day air you breathe.  Unfortunately, these can include and are not limited to smog and cigarette smoke.  Free radicals can damage your skin if they get into your pores and make your face look even more tired.

    The egg is important in this recipe because the egg whites help to tighten your pores thus giving you a smoother finish and the egg yolks help to nourish your dry skin and it also contains Vitamin A which is actually found in many acne products.

    Read on for the recipe, after the jump.


    336602_Anti-aging Deep Tissue Repair Cream from Kate Somerville

    Ingredients:

    1 egg
    1 tsp honey
    1 tbsp cornmeal (or any thickening agent-I use powdered milk)

    Directions:

    Mix all the ingredients together.  It may be easier to beat the white of the egg first so that it is stiff enough to apply the mixture but the powdered milk or cornmeal should help create a paste.  Apply this mask to your face using your fingertips and leave it on for 10-15 minutes.  Rinse off thoroughly and pat dry.

    Enjoy!
    --
    Don't Miss Other Home Remedies:

    Sunday, April 22, 2012

    Tip of the Day! Use Club Soda for Smoother Hair

    Club Soda for Smoother Hair

    Club soda can not only be used as a refreshing drink, but dumping some of this stuff onto your hair is beneficial too!  It rids your hair of dirt and any left over residue leaving your hair cleaner and brighter looking.  So, if you're suffering from frizzy hair, this could be the solution for your stubborn locks. 

    Ingredients:

    3-4 cups of unflavored club soda (you can buy any of these)

    Directions:

    Shampoo your hair as usual.  If you usually condition your hair, skip that step this time.  Dump the club soda onto your hair and then rinse it off with cold water.  Style your hair as usual.  You will notice a big difference in the amount of frizz in your hair.

    Enjoy!
    --

    Don't Miss Other Home Remedies:

    Saturday, April 21, 2012

    Chocolate Face Mask

    Chocolate Face Mask

    The first thought that came to mind when I heard about the chocolate face mask had everything to do with images of acne popping up all over my face.  I mean, we have been thoroughly led to believe that chocolate (oh, that delicious stuff of my dreams) equates acne.  Some of us experienced chocoholics have even been through, what we believe, was a chocolate induced acne attack on our faces.

    You can now get rid of those horrid images of acne and take solace in the fact that certain kinds of chocolate are actually good for you.  Chocolates high in flavonoids (not to be confused with flavonols) are good for your body because of their antioxidant properties.

    The chocolate antioxidant properties applies to chocolate consumed orally and chocolate applied topically to your skin, which is what this post is about: a sun-protecting chocolate face mask for normal skin.  Cocoa powder high in flavonoids helps protect your skin against UV/sun damage much in the same way as tomatoes do.  Also, the rolled oats in this chocolate face mask recipe exfoliates your skin.

    Read on for the recipe, after the jump.


    377692_Before and After_Banner_300x250
    Ingredients:

    *1/2 cup of cocoa powder high in antioxidant flavanoids (I use Hershey's Baking Cocoa Natural Unsweetened, 8oz Can)
    3 tbsp of heavy cream
    3 tsp rolled oats

    *Make sure your cocoa powder has not been Dutch processed because the process gets rid of most of the antioxidants.

    Directions:

    Grind/blend the rolled oats so that it is a fine powder.  Mix the cocoa powder, fine rolled oats, and heavy cream together in a bowl until it is a paste that you can use on your face.  Apply the chocolate face mask to your face using your fingers and leave it on for 10-15 minutes.

    Rinse off and pat dry.  Tone and moisturize as usual.

    Enjoy!
    --
    Don't Miss Other Home Remedies:

    Friday, April 20, 2012

    Turmeric Could Help Prevent Heart Attack

    Turmeric Could Help Prevent Heart Attack

    A new study suggests that turmeric could help prevent heart attacks after surgery.  Curcumins, which give turmeric the yellow pigment it is known for, could help ease surgical risks when used in conjunction with traditional treatment. (You can read more about turmeric's healing properties I wrote about by clicking here.)

    During bypass surgery, the heart muscles and surrounding muscles weaken due to a lack of blood flow which then can lead to the patient having a heart attack.  The use of curcumins for cancer therapy is already being tested.

    Inflammation plays a big part in diseases such as heart disease which is why it is no surprise that turmeric's anti-inflammatory and antioxidant properties are substantial reasons behind this study for this form of treatment.

    You can read more about this study here:
    http://www.reuters.com/article/2012/04/16/us-turmeric-idUSBRE83F03420120416

    Don't Miss Other Home Remedies:

    Thursday, April 19, 2012

    Olive Oil and Yogurt Hair Conditioner

    Olive Oil and Yogurt Hair Conditioner

    If your hair is in need of a deep conditioning treatment consider this homemade hair mask before making an appointment for a salon or altogether just giving up on your hair.  There is hope!  Hair needs just as much nourishing as the rest of our body.  We tend to pay more attention to our faces and our body than we do our hair, and because of that reason, many of us are left with what used to be shiny hair, but is now just a mess.

    Try this olive oil and yogurt conditioning hair mask for shinier, conditioned locks.

    Ingredients:

    1 teaspoon olive oil
    1 cup yogurt

    Directions:

    Mix the yogurt and the olive oil together in a bowl.  Apply it to your dry hair.  Leave it on for five minutes and then rinse it off with cold water.  Use this conditioning mask twice a week, and you'll start to see a difference.

    Enjoy beautiful hair!
    --
    Don't Miss Other Home Remedies:

    Tuesday, April 17, 2012

    Tomatoes & Rolled Oats for Brighter Skin

    Tomatoes & Rolled Oats for Brighter Skin

    Tomatoes are great for your skin because they contain Vitamins A, B, C, and E.  They also have anti-aging properties as well which help protect your skin against free radicals such as pollution and cigarette smoke.  Tomatoes are also known for their blackhead removal ability and help rejuvenate your skin cells leaving your face looking fresh and clean.

    Oatmeal (rolled oats) helps to exfoliate your skin so that you do not accumulate dead skin cells which end up clogging your pores, blocking them which can cause acne.  

    If you are looking for a skin brightening and exfoliating mask, which also helps prevent acne, give this one a chance.  It's all natural and homemade.

    Read on for the recipe.

    Ingredients:

    1 tomato

    Directions:

    Take the oatmeal and blend it until it becomes a powder.  Mash the tomato so that it's a pulp that you can mix with the oatmeal.  Add enough to make a paste for your face.  

    Make sure your face is clear of any makeup before you use this mask.  Clear skin absorbs the nutrients better. Leave this paste on your face for 10-15 minutes and then wash off and pat dry.  Tone & moisturize as usual.  If you don't have a toner, click here to see how you can use lemon juice as a toner.

    Enjoy!
    --
    Don't Miss Other Home Remedies:


    Related Posts Plugin for WordPress, Blogger...

    .