Vision Without Glasses - How To Naturally Sharpen Your Vision and Throw Away Your Glasses or Contacts WITHOUT SURGERY!
Showing posts with label skin care skin treatment. Show all posts

Saturday, October 27, 2012

Lemon Sugar Hand Scrub

Lemon Sugar Hand Scrub

During the winter I struggled with the embarrassing problem of having dry hands. The dry winter weather has wreaked havoc on my skin in general, so I decided enough was enough. Since many of us are on a budget, I decided to use whatever I have in my pantry to make a simple, easy to use lemon sugar scrub for your skin. You should already have most, if not all, of these items in your kitchen pantry already. If not, these items can be found at your local grocery store for less than $20.

Ingredients:

1 medium lemon
1 cup white sugar
1/2 cup grapeseed oil (buy grapeseed oil here.)
2-3 tbsp honey (optional)
1 tbsp coffee grounds (optional)

The amount of the ingredients you use depends on how much you want to make for yourself. I suggest not making too much because the mixture should be used within a month of being made since the items are food items and thus perishable.


Directions:

Take a medium sized mixing bowl.

Add a cup of sugar followed by half a cup of grapeseed oil.  Sugar and Oil should have a 2:1 ratio.

Start to mix using a spoon until it develops a slushy texture.  Add 2-3 tablespoons of honey.


Squeeze half a medium sized lemon into the mixture.  (If you are planning on using this regularly, then consider purchasing lemon juice here.)  Zest the lemon and add to the mixture. You can use a grater to zest the lemon. If you stir it enough, you should not be able to see the zest.  It is okay if you are able to, however.

Repeat once or twice a month or as needed.

Storage:
The mixture above makes enough for a 10 oz spice jar or you can gift them to other in smaller spice jars that are 2.5 oz each.

There is no need to put this in the fridge, but remember to use the scrub within 1 month of making it. Also, you can use this scrub for your entire body in the shower.

Don't Miss Other Home Remedies:


Friday, July 13, 2012

Tomato Yogurt Fresher Skin Formula

Tomato Yogurt Fresher Skin Formula

Shed your dead skin cells!  Our skin has a layer of dead cells that are bound together by a "glue."  Exfoliation is the key in maintaining a fresh and clean complexion and shedding your dead skin cells.

This face mask works for all skin types and is especially beneficial if your skin is constantly exposed to outdoor elements.  Whether you're an outdoors or indoors person, this face mask will help freshen your face up without the use of any harsh stimulants or chemicals.

This is an quick and simple formula that will help dissolve the "glue" that is binding the dead skin cells together (alphahydroxy fruit acid from the tomatoes) revealing your smoother, softer skin underneath.

Ingredients:

2 tbsp yogurt
1/2 chopped tomato
1/4 cup sugar (granulated)

Directions:

Add the sugar and tomato into a bowl and use just enough tomato to make a paste out of the sugar.  Add the yogurt and continue until it's a smooth paste.  Apply directly onto skin--massage gently.  Leave on for 10 minutes and rinse off with warm water. Pat dry.

Make sure you wash your face and that it is damp when you apply this mask.

Note: Leave out the sugar if it is too rough for your face, but use the whole exfoliating formula on your body.

Enjoy your smoother skin!
--

Don't Miss Other Home Remedies:


Thursday, June 7, 2012

Simple Turmeric and Milk Face Mask

Simple Turmeric and Milk Face Mask

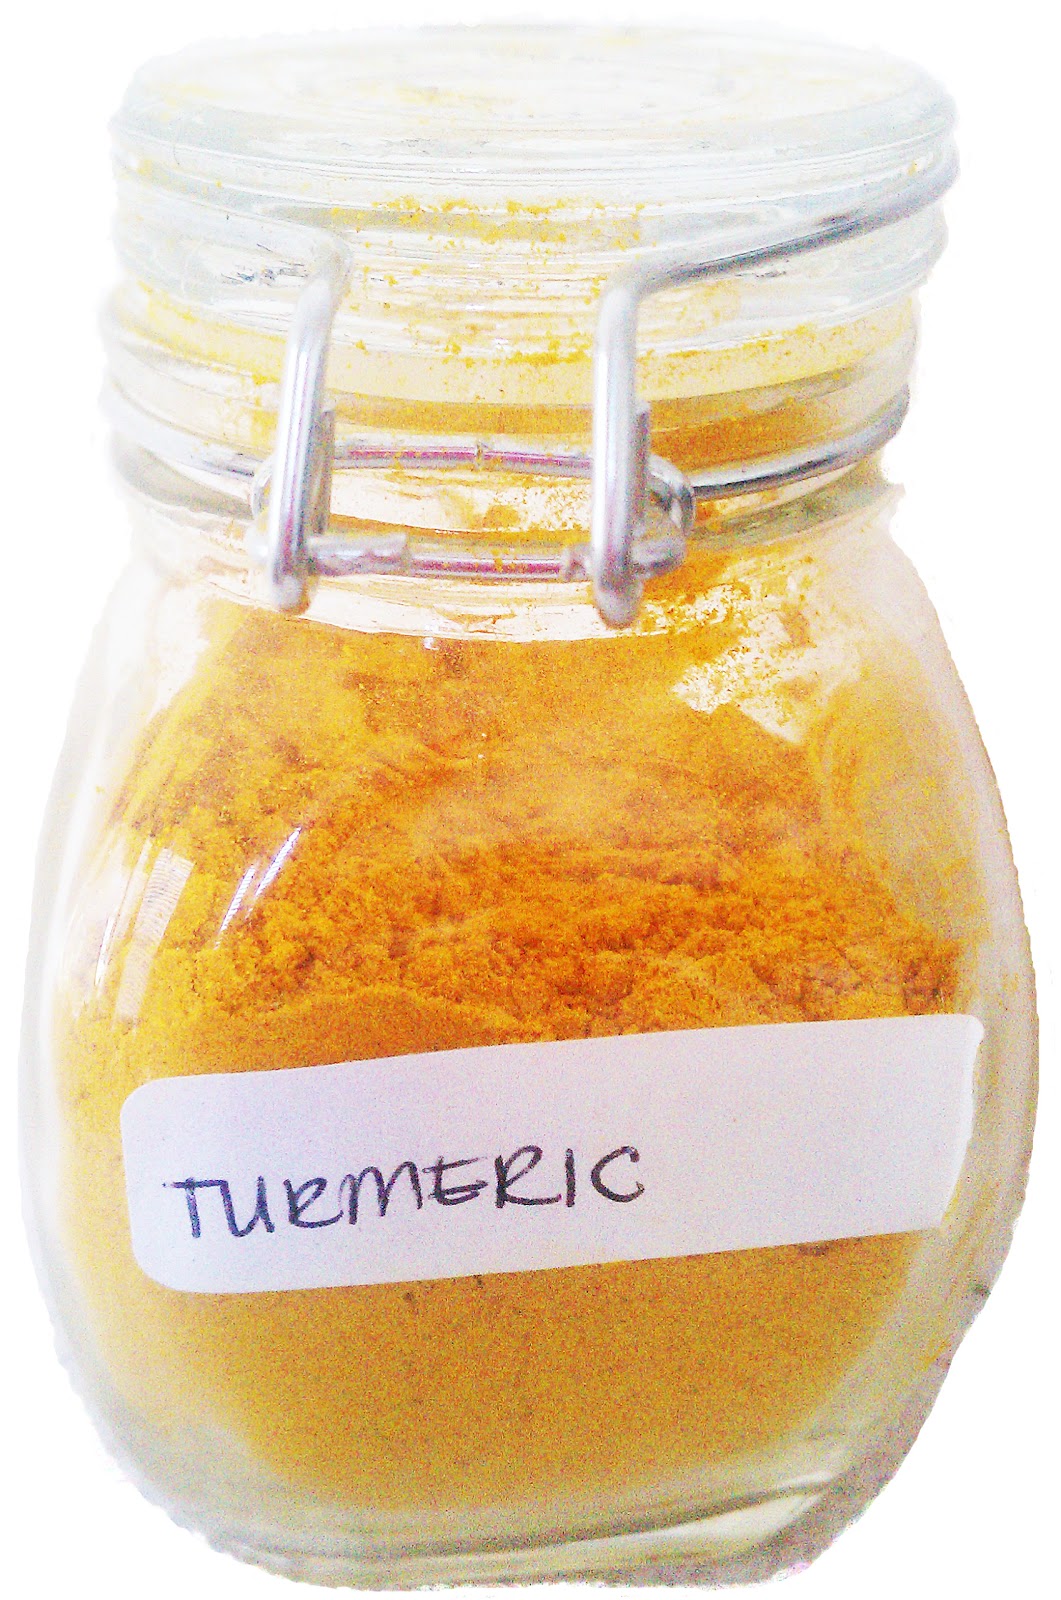
Turmeric is probably not the first thing you think of when you hear the words "face mask."  I just used this face mask myself.  I had a few minutes to relax and decided to whip up a turmeric and milk concoction and was very pleasantly surprised.  I had been reading about the healing powers of turmeric for some time now and the results are very encouraging for the people like you and me!  Read more about the healing powers of turmeric here.

Ingredients:

2 tsp turmeric powder
1 tbsp milk (enough to make a paste)

Yardley 359594 Yardley Of London Apothary Face & Body Mask- Case of 100 

Directions:

Mix the ingredients together to make a paste.   Don’t worry if the paste seems too runny.  It will thicken and harden on your face.

Using your fingers or cotton swabs, rub the paste over your face, avoiding the eye area.  It doesn’t smell funny–just a little spicy.  Keep the mask on for 15-20 minutes.

You will feel your face start to tighten as the mask dries.  Wash off and rinse with cold water.

My face feels really soft and the turmeric faste paste has actually gotten rid of my t-zone shine.  No matter what, my nose always ends up being shiny but this seems to have helped that! Awesome!

Remember! Turmeric stains so make sure you do not get any on your clothes or wear something you don’t mind staining (I just put on an oversized t-shirt that I’ll never wear in public anyway).


Don't Miss Other Home Remedies:


    Friday, April 27, 2012

    Life's A Peach: Revitalizing Face Mask

    Life's A Peach: Revitalizing Face Mask

    Peaches are really good for your skin which is why they are used in many cosmetic and skin treatments.  They contain Vitamin C and Vitamin E which are imperative in the creation of collagen in your skin.  Applying peaches topically helps your skin tremendously because peaches help unclog pores, smooth fine lines, and revitalize your face.

    Other ingredients in this homemade facial include honey and yogurt.

    Honey helps your skin retain moisture and the yogurt helps bring all of the ingredients together as it moisturizes your face while simultaneously fighting acne.

    Read on for the recipe.

    Ingredients:

    1 peach
    2 tbsp yogurt
    3 tsp honey

    Directions:

    Mix all the ingredients together in a blender.  This is easiest made in a blender, but if you don't have access to one, you can use a fork and mash up the peach pulp as best you can.  Don't forget to remove the pit.  Apply the mask to your face using your fingertips.  Leave it on your face for 10-15 minutes and then remove it with water and pat dry.

    Enjoy revitalized skin!
    --
    Don't Miss Other Home Remedies:

    Wednesday, April 25, 2012

    Moisturizing Honey & Egg Face Mask

    Moisturizing Honey & Egg Face Mask

    Do you have dry, tired looking skin?  If you're suffering from skin that doesn't retain moisture and is consistently dry then this moisturizing honey and egg face mask is the one for you! (If you're looking to nourish your skin for it to be more supple, then this mask will also work).

    Honey has antioxidant properties and is really good at retaining moisture in your skin.  The antioxidants help to keep all the free radicals from affecting your skin.  Free radicals are chemicals that are in the every day air you breathe.  Unfortunately, these can include and are not limited to smog and cigarette smoke.  Free radicals can damage your skin if they get into your pores and make your face look even more tired.

    The egg is important in this recipe because the egg whites help to tighten your pores thus giving you a smoother finish and the egg yolks help to nourish your dry skin and it also contains Vitamin A which is actually found in many acne products.

    Read on for the recipe, after the jump.


    336602_Anti-aging Deep Tissue Repair Cream from Kate Somerville

    Ingredients:

    1 egg
    1 tsp honey
    1 tbsp cornmeal (or any thickening agent-I use powdered milk)

    Directions:

    Mix all the ingredients together.  It may be easier to beat the white of the egg first so that it is stiff enough to apply the mixture but the powdered milk or cornmeal should help create a paste.  Apply this mask to your face using your fingertips and leave it on for 10-15 minutes.  Rinse off thoroughly and pat dry.

    Enjoy!
    --
    Don't Miss Other Home Remedies:

    Saturday, April 21, 2012

    Chocolate Face Mask

    Chocolate Face Mask

    The first thought that came to mind when I heard about the chocolate face mask had everything to do with images of acne popping up all over my face.  I mean, we have been thoroughly led to believe that chocolate (oh, that delicious stuff of my dreams) equates acne.  Some of us experienced chocoholics have even been through, what we believe, was a chocolate induced acne attack on our faces.

    You can now get rid of those horrid images of acne and take solace in the fact that certain kinds of chocolate are actually good for you.  Chocolates high in flavonoids (not to be confused with flavonols) are good for your body because of their antioxidant properties.

    The chocolate antioxidant properties applies to chocolate consumed orally and chocolate applied topically to your skin, which is what this post is about: a sun-protecting chocolate face mask for normal skin.  Cocoa powder high in flavonoids helps protect your skin against UV/sun damage much in the same way as tomatoes do.  Also, the rolled oats in this chocolate face mask recipe exfoliates your skin.

    Read on for the recipe, after the jump.


    377692_Before and After_Banner_300x250
    Ingredients:

    *1/2 cup of cocoa powder high in antioxidant flavanoids (I use Hershey's Baking Cocoa Natural Unsweetened, 8oz Can)
    3 tbsp of heavy cream
    3 tsp rolled oats

    *Make sure your cocoa powder has not been Dutch processed because the process gets rid of most of the antioxidants.

    Directions:

    Grind/blend the rolled oats so that it is a fine powder.  Mix the cocoa powder, fine rolled oats, and heavy cream together in a bowl until it is a paste that you can use on your face.  Apply the chocolate face mask to your face using your fingers and leave it on for 10-15 minutes.

    Rinse off and pat dry.  Tone and moisturize as usual.

    Enjoy!
    --
    Don't Miss Other Home Remedies:

    Friday, April 20, 2012

    Turmeric Could Help Prevent Heart Attack

    Turmeric Could Help Prevent Heart Attack

    A new study suggests that turmeric could help prevent heart attacks after surgery.  Curcumins, which give turmeric the yellow pigment it is known for, could help ease surgical risks when used in conjunction with traditional treatment. (You can read more about turmeric's healing properties I wrote about by clicking here.)

    During bypass surgery, the heart muscles and surrounding muscles weaken due to a lack of blood flow which then can lead to the patient having a heart attack.  The use of curcumins for cancer therapy is already being tested.

    Inflammation plays a big part in diseases such as heart disease which is why it is no surprise that turmeric's anti-inflammatory and antioxidant properties are substantial reasons behind this study for this form of treatment.

    You can read more about this study here:
    http://www.reuters.com/article/2012/04/16/us-turmeric-idUSBRE83F03420120416

    Don't Miss Other Home Remedies:

    Tuesday, April 17, 2012

    Tomatoes & Rolled Oats for Brighter Skin

    Tomatoes & Rolled Oats for Brighter Skin

    Tomatoes are great for your skin because they contain Vitamins A, B, C, and E.  They also have anti-aging properties as well which help protect your skin against free radicals such as pollution and cigarette smoke.  Tomatoes are also known for their blackhead removal ability and help rejuvenate your skin cells leaving your face looking fresh and clean.

    Oatmeal (rolled oats) helps to exfoliate your skin so that you do not accumulate dead skin cells which end up clogging your pores, blocking them which can cause acne.  

    If you are looking for a skin brightening and exfoliating mask, which also helps prevent acne, give this one a chance.  It's all natural and homemade.

    Read on for the recipe.

    Ingredients:

    1 tomato

    Directions:

    Take the oatmeal and blend it until it becomes a powder.  Mash the tomato so that it's a pulp that you can mix with the oatmeal.  Add enough to make a paste for your face.  

    Make sure your face is clear of any makeup before you use this mask.  Clear skin absorbs the nutrients better. Leave this paste on your face for 10-15 minutes and then wash off and pat dry.  Tone & moisturize as usual.  If you don't have a toner, click here to see how you can use lemon juice as a toner.

    Enjoy!
    --
    Don't Miss Other Home Remedies:


    Monday, April 16, 2012

    Tip of the Day: Milk Makeup Remover

    Milk As a Makeup Remover

    When I first heard that milk could remove makeup, I was a bit hesitant to believe it because there is a billion dollar industry out there that caters to this very kind of thing.  Could it be that the inexpensive, natural, and non-chemical makeup remover is right there in my fridge? Yes. It's true!  The milk actually removed my makeup.

    Ingredients:

    Milk

    Directions:

    Dab some milk on a cotton ball or cotton swab.  Wipe it gently across your eyes.  Once you're done, continue to wash your face as usual! :)

    Enjoy!
    --
    Don't Miss Other Home Remedies:


    Jillian Michaels

    Sunday, April 15, 2012

    Red Grapes & Flour Facial Mask for Energized Skin

    Red Grapes & Flour Facial Mask for Energized Skin

    Grapes contain antioxidants such as flavonoid, resveratrol, and tannin.  (Tannin is what gives wines the "dry" feeling when you drink it).  These antioxidants are great for your skin and are also good skin whiteners.

    Grapes contain a large amount of amino acids which are essential in the rebuilding of your your skin cells.  They also contain high amounts of B vitamins along with potassium and iron.

    Use this face mask to rejuvenate your skin before a big event or once a week to keep your skin looking fresh!

    Read on for the recipe, after the jump.

    Ingredients:

    3/4 cup-1 cup of red grapes
    few tablespoons of all purpose flour

    Directions:

    Mash the red grapes into a pulp.  Add a few tablespoons of all purpose flour to to the grape pulp.  The flour acts as a base so that you can create a paste like mixture.  Once you are done mixing, apply the paste to your face as a mask, avoiding the eyes, and lie down for 15-20 minutes.  Make sure that when you apply the mixture to your face you gentle with your skin.  Rinse off properly with water and pat dry.  Tone and moisturize as usual.

    Enjoy revitalized skin!
    --

    Don't Miss Other Home Remedies:


    Tip of the Day! Use Potatoes to Remove Dark Under Eye Circles

    Use Potatoes to Remove Dark Under Eye Circles

    Many of us suffer from dark under eye circles.  Our eyes are one of the first features most people notice.  If you're like me and have chronic dark under eye circles, then you are used to either dealing with the way they look and going all natural or you have gotten really good at covering them up with salmon colored eye concealer. 

    While there is no actual cure for dark under eye circles, people have tried to reduce the appearance of them by going as far as using surgical methods.  Unfortunately, these methods most often have a less success to failure ratio.

    The homemade answer to your problem might actually be in your pantry.  Potatoes have been known to cure dark under eye circles for centuries.  Potatoes contain a chemical called catecholase which is a powerful skin lightening substance. Catecholase is found in many skin lightening products on the market today.

    If you have 15 minutes and a potato then this dark under eye circle homemade remedy is definitely worth a shot!

    Ingredients

    1 potato
    2 pieces of cheesecloth(you can buy cheesecloth here)

    Directions

    Wash and peel the tomatoes like you normally would and then use a grater and shred the potato so that you have enough to great two eye bags from them.

    Once you have shred the potatoes, put them in two separate pieces of cheesecloth.  I didn't have cheesecloth so I had to order them from amazon.com.

    Place each one under your eyes and lie down for about 15-20 minutes.  Once time is up, wipe off any residue.  Repeat as necessary throughout the week.

    Update: Another way to use this recipe would be to create a paste out of it.  I've found this to be quicker than using the cheesecloth method, and it's just as effective. Instead of putting the potatoes in the cheesecloth, blend the potato and the potato's skin to create a paste.  Apply the paste under your eyes and leave it on for 5-10 minutes.  Do this every day for best results.

    --
    Don't Miss Other Home Remedies:

    Saturday, April 14, 2012

    Foot Softening Milk Spa Soak

    Foot Softening Milk Spa Soak

    Oftentimes, we forget about a couple of our most important body parts--our feet!  It's easy to overlook our poor, tired achy feet while we obsess over our faces and hair.  While, it's great to make sure our faces and hair looks great, we should also make sure our feet are getting the tender loving care they deserve.  After all, the last thing we want is cracked, dry, and hard feet when we get older!

    This is a simple milk, water, and sugar foot spa recipe that you can quickly throw together in a couple of minutes with items you are almost guaranteed to have in your fridge and pantry.

    Ingredients

    1/2 cup sugar
    2-3 cups milk
    7-8 cups of water
    2-3 tablespoons of your favorite body lotion.

    Directions

    Mix the milk and the water together on a stove and stir and heat so that it is hotter than room temperature and as hot as your feet can handle.  Be careful to test it so that you don't burn yourself!  Mix the sugar and the lotion together in a separate bowl.  This mixture will be used to exfoliate your feet.

    Place the milk and water in a bowl on the floor in a bowl and place your feet in it.  Soak for at least 10 minutes and let your feet relax.

    Use the lotion and sugar mixture and massage your feet with it to exfoliate and get rid of your dead skin cells.  Do this for a few minutes and then rinse your feet with water.  Dry your feet and apply a moisturizer.  I use coconut oil to moisturize my feet after this mixture as it is a great moisturizer and then I follow it with grapeseed oil.  I find that grapeseed oil is better at retaining moisture in your skin than lotions in general are.

    Enjoy your soft feet!
    --
    Don't Miss Other Home Remedies:


    Thursday, April 12, 2012

    Apple & Honey Face Mask for Clear Skin

    Apple & Honey Face Mask for Clear Skin

    If you are suffering from tired looking, fatigue and stressed out skin then this apple & honey face mask is the one for you!  Give yourself a facial (and mental) uplift by applying this nourishing and protecting apple and honey face mask.

    The apple contains vitamins A, B, and C and which your skin will absorb, contains antioxidant properties, and helps relieve damage from the sun.  In fact, apples have been used in many skincare remedies for sunburns due to these properties.  

    Apples also contain glycolic acide which helps exfoliate and clear your pores.

    Honey is antibacterial and has antioxidant and hygroscopic properties.  All that means is that honey will help get rid of topical bacteria and help retain moisture.  And, antioxidants are substances that help protect your skin from free radicals in the environment (chemicals in the air, etc.)

    Ingredients

    1 apple 
    2 tablespoons of honey

    Directions

    Peel, core, and chop the apple into pieces and put into a blender/food processor.  Add the 2 tablespoons of honey and mix well.  Apply to your face with your fingers and make sure you avoid your eyes.  Leave on for about 10-15 minutes and rinse thoroughly with warm water.  Remember to tone and moisturize your skin.  If you don't have a toner, I've explained how you can use lemon juice as a toner here.

    Enjoy beautiful skin!
    --

    Don't Miss Other Home Remedies:


    Wednesday, April 11, 2012

    Tip of the Day! Tomatoes for Reduced Pores, Acne

    Tip of the Day! Tomatoes for Reduced Pores, Acne

    Did you know that tomatoes are an astringent?  Which means, if you apply tomatoes on your face, your pores should start to look noticeably smaller after a few uses.  It's tough to find the right product for your face from stores, and before trying all those chemicals, give the natural ones in your home a try first.  You will save yourself a ton of money experimenting on finding the right product.

    Tomatoes contain astringent, along with blackhead reducing and oil controlling properties which is why its pulp is great for those looking to reduce acne, large pores, oiliness which is why it is such a popular ingredient in face masks for blemished skin!

    This mask is quick, easy, and requires only 1 ingredient!

    Ingredients:

    1 tomato

    Directions:

    Take one tomato and mash up the pulp with a fork.  Apply this pulp liberally all over your face and let it sit for 10-15 minutes.  This mask is natural and safe enough to use every day.  You should see a reduction the the oiliness and pore size.

    Enjoy acne free skin!
    --

    Don't Miss Other Home Remedies:


    Delicious Vanilla Brown Sugar Scrub

    Delicious Vanilla Brown Sugar Scrub

    Get your winter dry skin to spring time perfection with this exfoliating Vanilla Brown Sugar scrub.  The sugars in this scrub as as exfoliating granules that scrub off your dry skin.

    Ingredients:

    2 cups of brown sugar
    1 cup of white/granulated sugar
    1 cup of grapeseed oil
    1 tbsp pure vanilla extract (I use McCormick Pure Vanilla Extract-16 OZ)

    Directions:

    Take the brown sugar, white sugar and grapeseed oil and mix well together until it is a paste.  Add the pure vanilla extract.  The grapeseed oil is great for retaining moisture in your skin.  You can use this paste all over your body.

    Make sure to go easy on more sensitive areas like your abdomen, and concentrate on rougher areas like your elbows and knees.  Massage the scrub over your body using either a washcloth or your fingers in a circular motion.  Rinse off with warm water and pat dry.


    You will come out of your shower smelling delicious!  This is a very moisturizing treatment due to the grapeseed oil, so moisturizing afterwards should not be necessary.

    Enjoy your new skin!

    --


    Don't Miss Other Home Remedies:

    Friday, April 6, 2012

    Honey & Cinnamon Mask for Acne

    cinnamon and honey for acne

    So, why is cinnamon and honey good for acne? 

    Let's first start with what acne is:  Acne can be caused by bacteria that lives on your skin.  It clogs your sebaceous glands.  These are glands that produce sebum, which is an oil that is necessary for the lubrication and pH level of your skin.  

    Honey is a natural antibacterial and anti-septic.  This means, when it is applied topically to your skin, it can help cure acne.  The antibacterial properties in honey help rid your skin from harmful acne causing bacteria.  This in turn prevents your pores from clogging and pus (bacteria) from forming.  IT will also help reduce redness and swelling.

    Cinnamon is a spice that is found in everyday foods such as curry in the East, and sweet foods (sweet rolls).  It is a versatile spice and can be used in cooking salty foods or sweet foods.  Cinnamon has microbial properties that can help stop the growth of bacteria and fungi on your skin.  

    This combined with the power of honey helps make cinnamon and honey clear acne.

    Please make sure you're not allergic to any of these ingredients before trying them.

    Ingredients:

    2 tbsp of honey (This is one of the best kind you can use: Manuka Honey Active UMF 18+ Certified East Cape New Zealand) Read more about why Manuka Honey is good for you.
    1 tsp of cinnamon

    Directions:

    Mix the honey and the cinnamon together so it blends well.  Before applying this mask make sure your face is clear of any makeup etc.  If you do have some on, rinse your face with warm water and pat dry.

    Apply this mask to your face using your fingertips.  Take this opportunity to massage your face and help increase circulation.  This mask is sticky so keep some napkins close by.  Keep it on your face for about 10-15 minutes.  If it starts to burn or itch take it off.  Please test an area first to make sure that you aren't allergic to the honey or cinnamon on your face.

    Rinse off and pat dry.  Remember to use a toner.  If you don't have one, you can use lemon juice as a toner.
    Don't have easy access to cinnamon? You can buy cinnamon sticks here.

    Enjoy!


    --

    Don't Miss Other Home Remedies:

    Thursday, April 5, 2012

    How to Make Sugar Wax (the non-wax strips kind)

    Hair removal can be a very expensive part of our body care routine, but it is something that all us ladies (well, most) take part in regularly.  Unfortunately, it can cost us a pretty penny if we haul ourselves out of the comfort of our homes and drive to an expensive, overly lit, salon.

    Fear not!  The ripping out of our hair from our bodies doesn't have to be so expensive!  There is an inexpensive DIY homemade sugar wax recipe that you can use --and the best part is, this process does not require wax strips since you will be using only your fingertips.  There's some savings for you!  You will only need three ingredients to create the sugar wax for sugaring purposes.

    Sugaring is safer than regular waxing because the mixture sticks to your hair and not to your skin.  For this reason, you can apply sugar wax against the direction of hair growth (since it sticks so well to hair) and then remove in the opposite direction using your fingertips.  This is one of the reasons that sugaring is supposed to be less painful than waxing, where the wax is applied in the direction of hair growth and then ripped out in the opposite direction.

    Other benefits of sugaring: the mixture is easily washed off, it should not irritate the skin since all ingredients are natural.  If you have sensitive skin, then test an area before sugaring. 

    Ingredients:

    2 cups of sugar (white/granulated)
    1/2 cup lemon juice
    1/2 cup water

    Directions:

    Mix the ingredients together and cook over the stove on high.  Keep Stirring.  The mixture will start to bubble a little.  When you see this start to happen reduce the heat to medium and keep stirring.  You will continue to stir until all of the sugar has melted and the mixture has turned a darker brown.  Put in a microwave safe container and let it cool.

    Test it with a spoon.  It should be hard enough to spread and sticky enough to pull since this type of wax is used with your fingertips. 

    Once the mixture is cool you can apply the sugar wax on your body.  If it hardens too much you can microwave it.  If you want to use this with wax strips instead, then warm it up so that it is thinner than honey consistency and then use a spatula or popsicle stick to spread the sugar wax and use cotton cloth strips to take the wax off.

    Enjoy!
    --
    Don't Miss Other Home Remedies:


    Wednesday, April 4, 2012

    Quick & Simple Honey Lemon Tightening Face Mask

    How to Lighten Hair Naturally (without nasty chemicals!)

    Let's face it. With the emphasis placed on looks these days, and our faces being one of the first things people notice about us, we want to make sure that our skins look tight and smooth so that we can make that great impression!

    This is a quick and simple honey and lemon face tightening mask. The honey is an antiseptic.  It's healing properties help soothe, hydrate and nourish your skin. The lemon is a natural astringent that helps clean out your pores and then acts as a toner to close them.

    Lemon is a natural cleanser, thus acting as a spot cleaner as well. Remember, lemon juice does bleach so your face will lighten with continued use.


     Ingredients:

    few drops of lemon juice
    1 tbsp of honey (or enough to cover your face) - use local raw honey for best results

    Directions:

    Wash your face with warm water and pat dry.

    Mix the honey and the lemon juice together and using your fingertips apply a thin layer of this mixture to your face.  It will feel sticky.  Move your fingers in an upward motion so as to work against gravity.

    Leave it on for 10-15 minutes and then rinse off and pat dry.

    You will start to notice a little bit of a difference in your skin right away, and with continued use (2-3 times a week for a couple of weeks) you should notice a difference in the texture and overall health of your skin.

    Make sure you are not allergic to any of these products before trying them on your face.

    Enjoy!
    --

    Don't Miss Other Home Remedies:


    Monday, April 2, 2012

    Coconut Oil & Oatmeal Face Mask for Acne

    Coconut Oil & Oatmeal Face Mask for Acne

    Our skin's pores contain oil glands called sebaceous glands.  These produce an oil called sebum which lubricates and protects our skin from bacteria and also helps regulate the skin's pH level (acidity).  Sebum contains these medium-chain fatty acids in the form of triglycerides.  Coconut oil is nature's best source of these medium-chain fatty acids thus helping our skin with its own processes.

    The presence of bacteria on our skins turn the triglycerides into microbial fatty acids on thus protecting the skin from infection making it great for the prevention and curing of acne.

    Combine the healing properties of coconut oil with the exfoliating properties of oatmeal and you are left with a face mask that will rid your face of dead skin cells (exfoliate) and and help cure your acne for good!

    Ingredients:

    1 tbsp Coconut oil (extra virgin) (enough to make a paste)
    1/2 cup rolled oats (instant or regular)

    Directions:

    Blend the rolled oats so that they turn into a fine powder.  This step is important in making sure your mixture is smooth and not chunky.

    Warm up the coconut oil so that it is a little over 76 degrees F (it's liquid point) and and it to the oatmeal powder.  Increase/decrease the amount depending on how creamy you want the mask to be.

    Smooth the mask out over your face using your fingertips and leave it on for 10-15 minutes.

    Wash off with warm water and pat dry.  Remember to use a toner before moisturizing or you will clog your pores!  If you don't have one, you can use ice or  click here to read the post on how to use lemon juice as a toner.

    Use this mask once a week or more depending on how sensitive your skin is, and you should start to see results.

    Need to buy coconut oil? Click here.

    Don't Miss Other Home Remedies:


    Sunday, April 1, 2012

    Carrot Face Mask for Oily Skin

    Carrot Face Mask for Oily Skin

    Not only are carrots good for your eyes, they are also great for your skin!  Carrots are high in Vitamin A and beta-carotene.  Beta-carotene is a product that comes from plants that the body eventually converts into Vitamin A.  Beta-carotenes are also high in anti-oxidants and acts as an immune booster when taken internally.  When applied topically these vitamins and minerals help to fight against sun damage which is the number one cause of wrinkles.

    Ingredients:

    1 medium sized carrot
    1 tbsp honey

    Directions:

    Steam or boil the carrots so that they are easy to mash or puree.  Add the honey and mix well together.  At this point you can add a few drops of lemon juice to help the consistency.  Lemon juice is a great cleaning astringent which helps to clear and close your pores resulting in smoother looking skin.

    Rinse your face with warm water and pat dry.  Add the face mask mixture to your face when cooler and leave on for 10-15 minutes.  Wipe off with a warm wash cloth or rinse with warm water and pat dry.

    Enjoy!
    --

    Don't Miss Other Home Remedies:


    Related Posts Plugin for WordPress, Blogger...

    .